 You have your lists of your guests attending the event. You will take your list and print their name badges, then hand them out to them, as simple as that and it is done! In making the name tags for the upcoming event you have to do and prepare the following: 1. Materials Choose the materials where you will print on the names. You can choose between perforated papers, stickers, and plastic holders styled for name badges. Look for the template that will go with your name tag paper, and create that mail merge together with the spreadsheet and the template of any event attendees. Bear in mind to have all things in alphabetical sequence in your spreadsheet, also when bringing together the name tags. It does not really matter if you want to sort them by last or first name, simple but a very important step, because this step will save you lots of time spent alphabetizing right after they had been printed. You will also make the registration procedures efficient for both of you and your visitors. 2. Information You have to know what information should be placed in each name tag and what printing to be used. You should also know how you are going to deal with late registrants. Creating a custom name badge and conference name badges in an event are two different events that you have to deal with and have to be ready about everything when printing these name tags plus the covering sections of these nameplates. Of course the person’s name is there, but the company and title of the wearer is important to be printed on their name tags. Name tags are very important in their corporate event planning, especially when the attendees concentrate on networking. But, be aware of placing too much data on every name badge because there is only too little room for so much information that the visitors wants to share and so you have to select the important ones to be in that tiny cardboard square. The name, the designation or the title and the company is just fine to be printed on the name tag are just fine. While some of the job titles may be quite lengthy, but you have to be careful and avoid the risk of inaccurate titles. The name tags must also be kept clean for it to be read easily. There are also companies that are doing partnerships with other companies and so each logo must be placed on each name plate. 3. Name Tag Templates and Printing The actual paper where you will print on will differ based on the kind of the name badge holder that you will use. Remember your name badge holders when making the decision. Be sure that the paper you will print on will be in shape with the plastic holders. Whichever kind you settle on using, remember that you need to look for the correct template, and each major brand will surely have their corresponding template. Just be sure that you are using a template with similar numbers! The “adhesive name badge” numbers are usually on the left, while the “name badge insert” are usually in the middle. These little formatting differences can throw off the whole page upon printing, and you may literally have to be again from scratch. Once you have the template, do the mail merges and insert the name of your spreadsheet to the template. This can integrate all the names of the attendees into the accurate format. The risk of misspelled names can be avoided. Don’t forget to place on the event logo and the company name and the moment the mail merge is complete, skim the final product to be sure that everything turned out right! 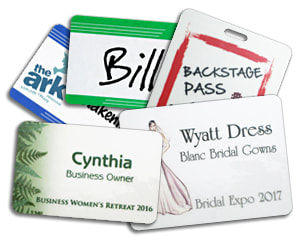 References:
Einst Urown, Kinds of Premium Grade of Clip-on and Special Event / Economy Badges, 2018 Kleertech, 2017, Name Badge Holder, Access 2018
0 Comments
Leave a Reply. |
Archives
July 2020
Categories |
 RSS Feed
